背景
MariaDB に phpmyadmin や HeidiSQL 等の外部ツールから接続したい。
環境
Rocky Linux 9
MariaDB 10.9
手順
MariaDB のインストール・設定は以下を参照

MariaDB のネットワーク設定を変更
/etc/my.cnf の末尾に以下を追加
[mysqld]
skip-networking=0
skip-bind-address
mariadb をリスタート
systemctl restart mysqld設定を確認
mysqld --print-defaults実行例:
[root@aaaaaaaaaaa ~]# mysqld --print-defaults
mysqld would have been started with the following arguments:

[root@aaaaaaaaaaa ~]# vi /etc/my.cnf

[root@aaaaaaaaaaa ~]# cat /etc/my.cnf
#
# This group is read both by the client and the server
# use it for options that affect everything
#
[client-server]

#
# include *.cnf from the config directory
#
!includedir /etc/my.cnf.d
[mysqld]
skip-networking=0
skip-bind-address
[root@aaaaaaaaaaa ~]# systemctl restart mysqld
[root@aaaaaaaaaaa ~]# mysqld --print-defaults
mysqld would have been started with the following arguments:
--skip-networking=0 --skip-bind-address
firewall を設定
Firewall の設定を変更しておきます。
MariaDBのポート「3306」を空けます。
firewall-cmd --permanent --add-port=3306/tcp --zone=public
firewall-cmd --reload
データベースを作成
外部からアクセスするデータベースを作成します。全許可はさすがによろしくありませんので。
既にデータベースがある場合はこの手順は不要です。
CREATE DATABASE IF NOT EXISTS testdb;アカウントを作成
root をそのまま使ってもいいのですが、念のため「testuser」というアカウントを別に作って、そのアカウントのみ外部からアクセスできるようにします。root で接続したい場合は root に変更してください。
「%」の部分はIPアドレスを設定できます。「192.168.0.%」と設定すると「192.168.0.0/24」のみ許可されます。
ここでは、すべてのIPからアクセスできるように設定します。
「passwd」は自身のパスワードを設定してください。
GRANT ALL PRIVILEGES ON testdb.* TO 'testuser'@'%' IDENTIFIED BY 'passwd' WITH GRANT OPTION;
設定は以上です。
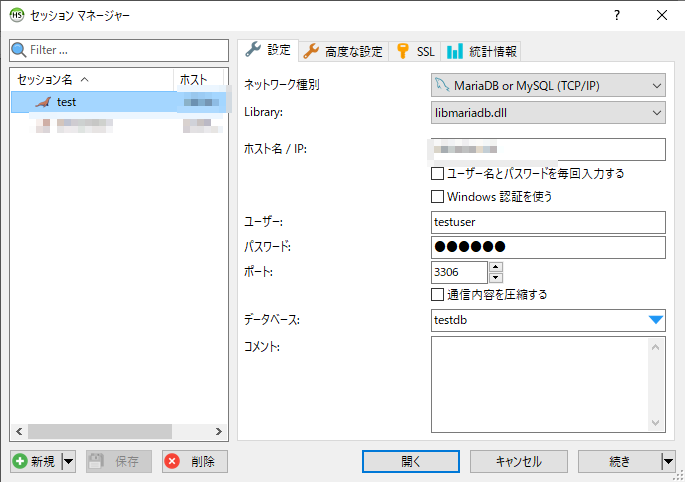
動作確認
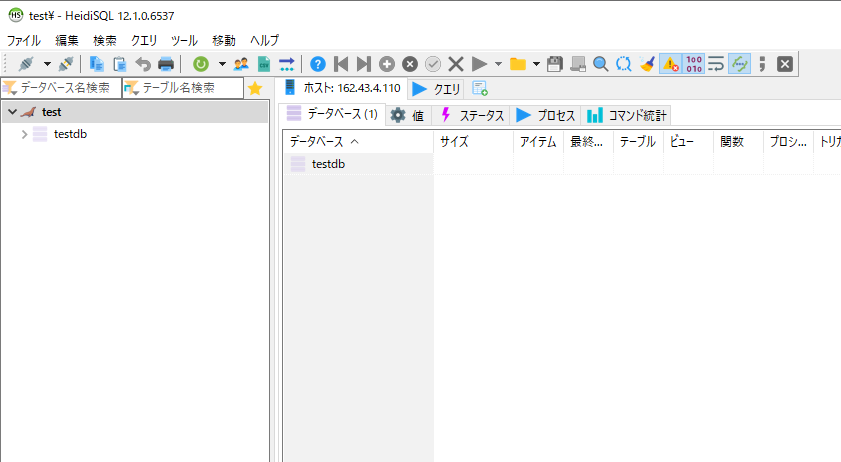
HeidiSQLから接続してみます。
接続できれば以下のような表示になります。
参考資料

https://mariadb.com/kb/en/configuring-mariadb-for-remote-client-access/
mariadb.com
コメント